Configuring a Customer Service Issue with Prospect2
Customer Service Issues (CSIs) are a feature in Tessitura that allow you to log, track, and resolve patron issues or requests. With Prospect2, associated Contact Methods and Activity Types can automatically generate CSIs based on a patron’s action or response, which can be assigned to the appropriate staff for follow up actions. This feature uses Prospect2’s Standard Automations and webhooks, which are triggered by patron’s interactions. CSIs can be used for a variety of issue or request types, like tracking VIP contact actions, obtaining feedback on a recently attended event, special requests, and more.
Configuring Your Customer Service Issue
- 1
-
Title Your Customer Service Issue Webhook
This is a name to identify the configured CSI webhook in the Prospect2 integration dashboard.

- 2
-
Add a Description (Optional)
Include a short description for internal use with information like what actions will happen in Tessitura as a result of this CSI being generated, as well as when and how the CSI webhook is triggered within an Automation.

- 3
-
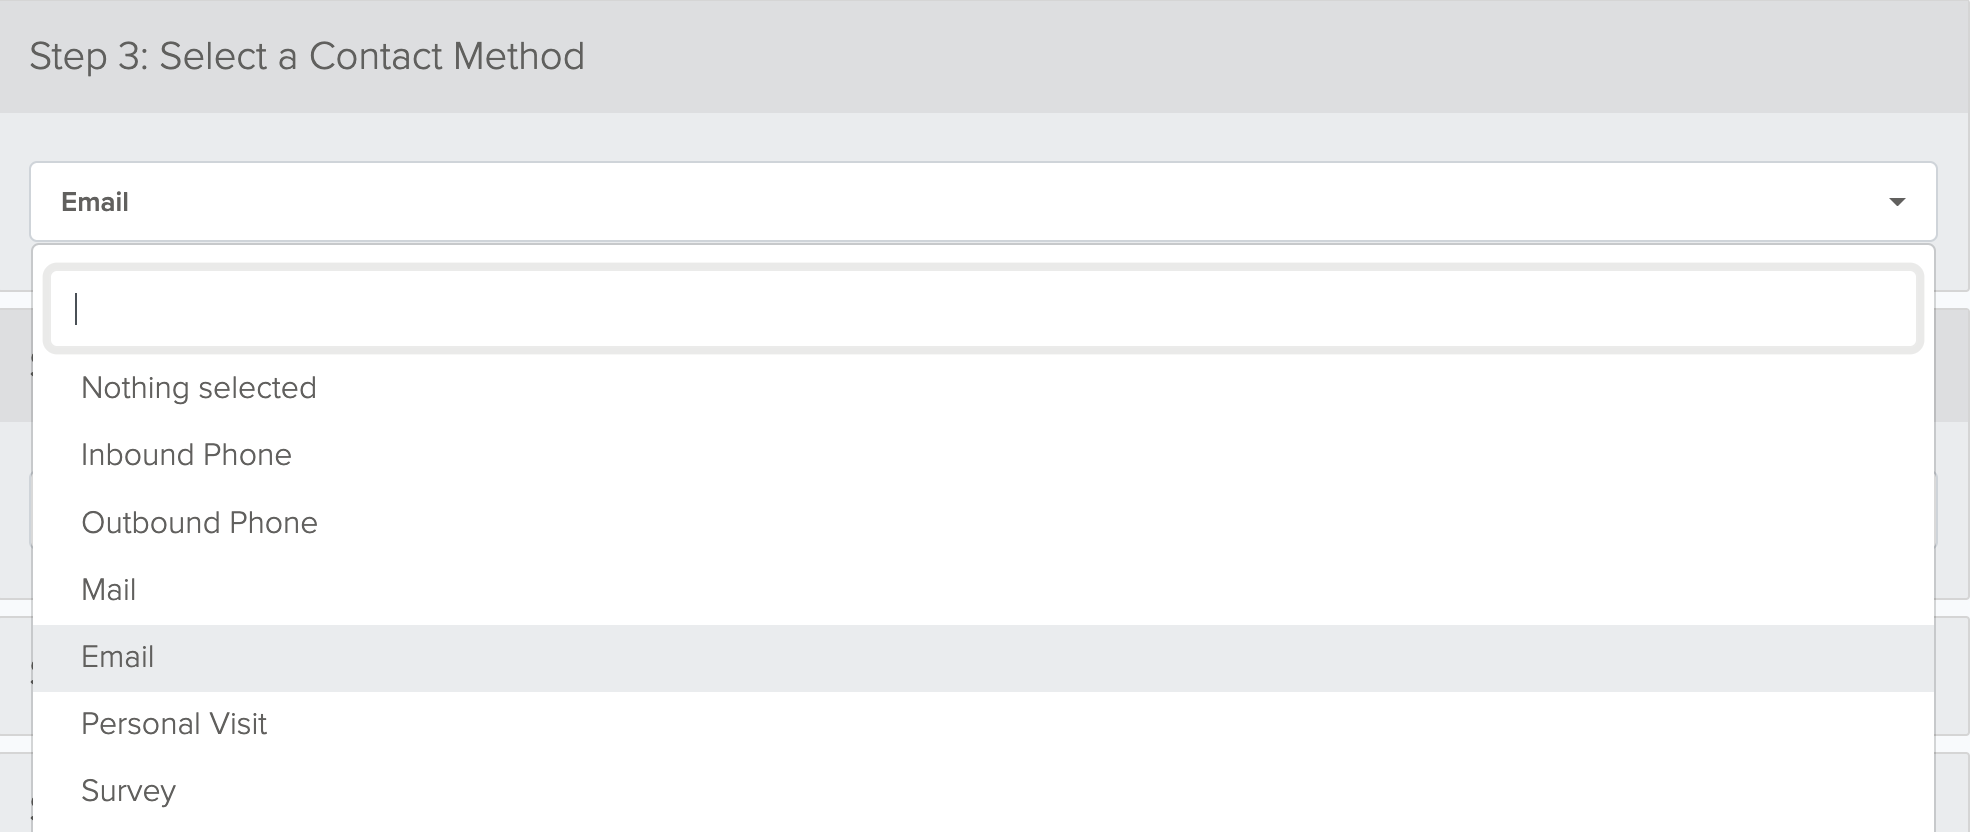
Select a Contact Method
Contact Methods are defined in the Tessitura system table TR_CONTACT_TYPE and provide context for how the CSI was created.

- 4
-
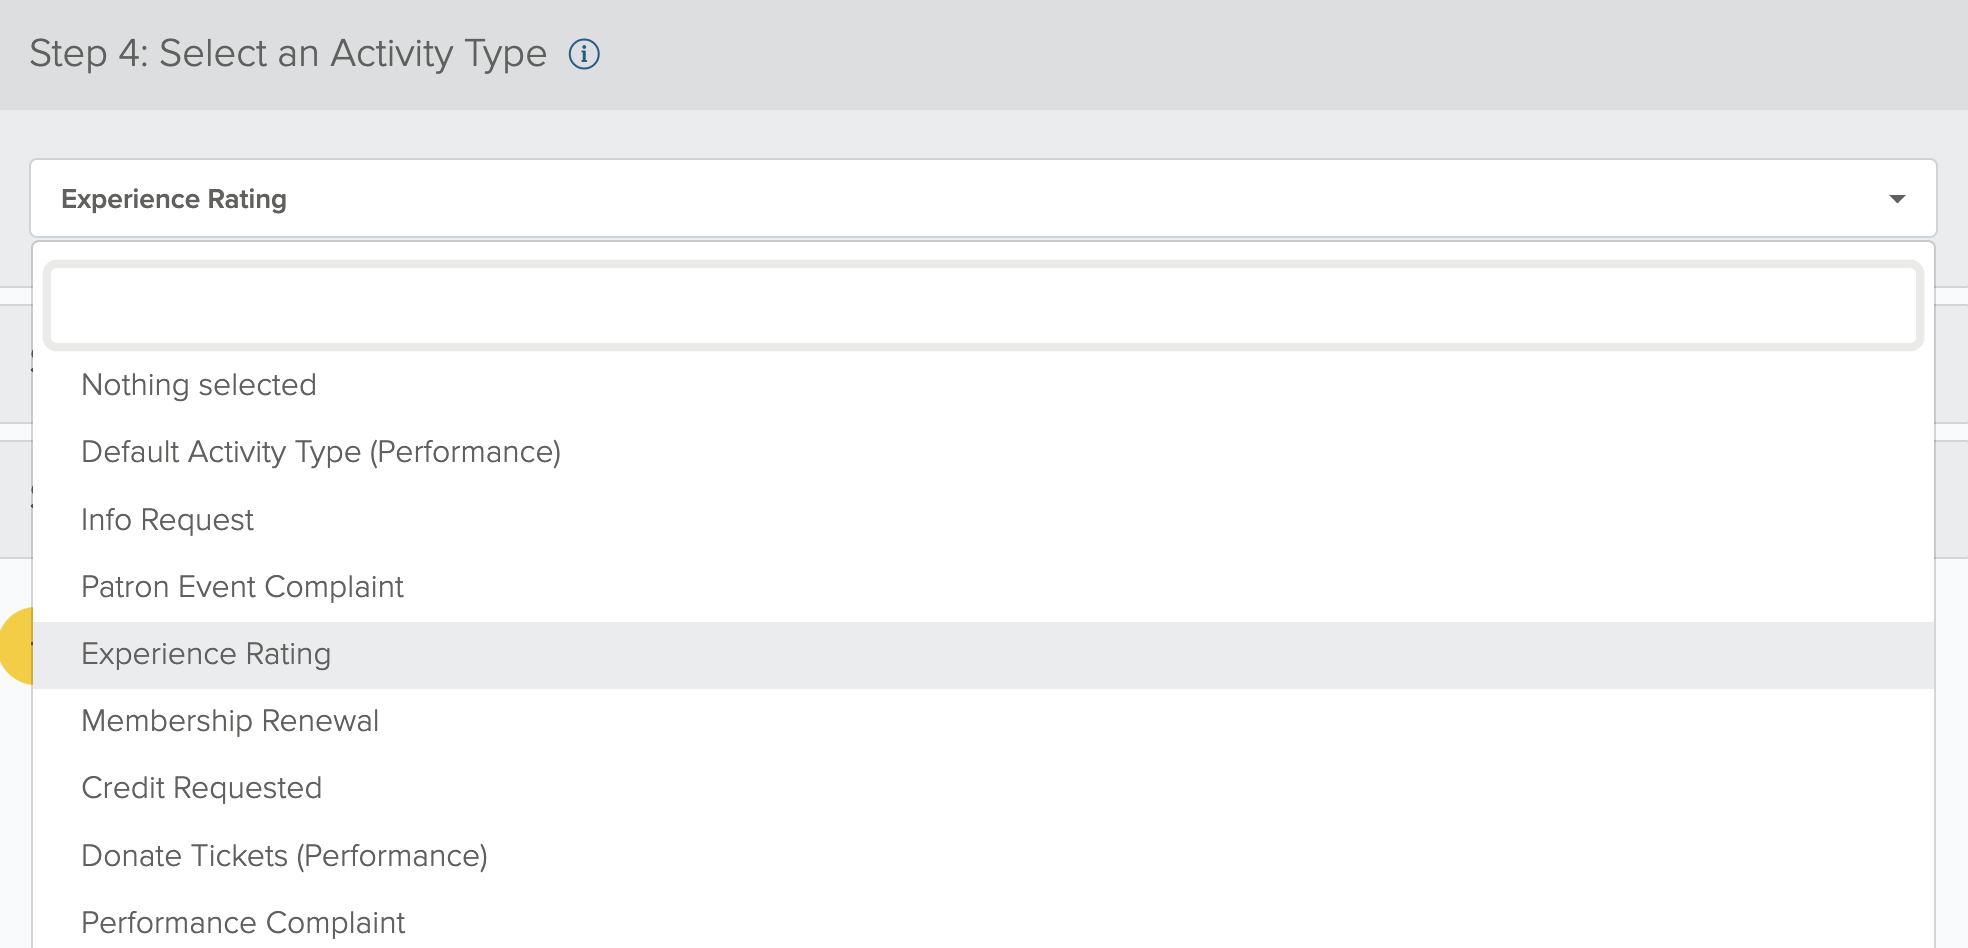
Select an Activity Type
Activity Types are defined in the Tessitura system table TR_CUST_ACTIVITY_TYPE and must have the Perf_Ind set to either “none” or “Performance” in order to display for selection in this step.

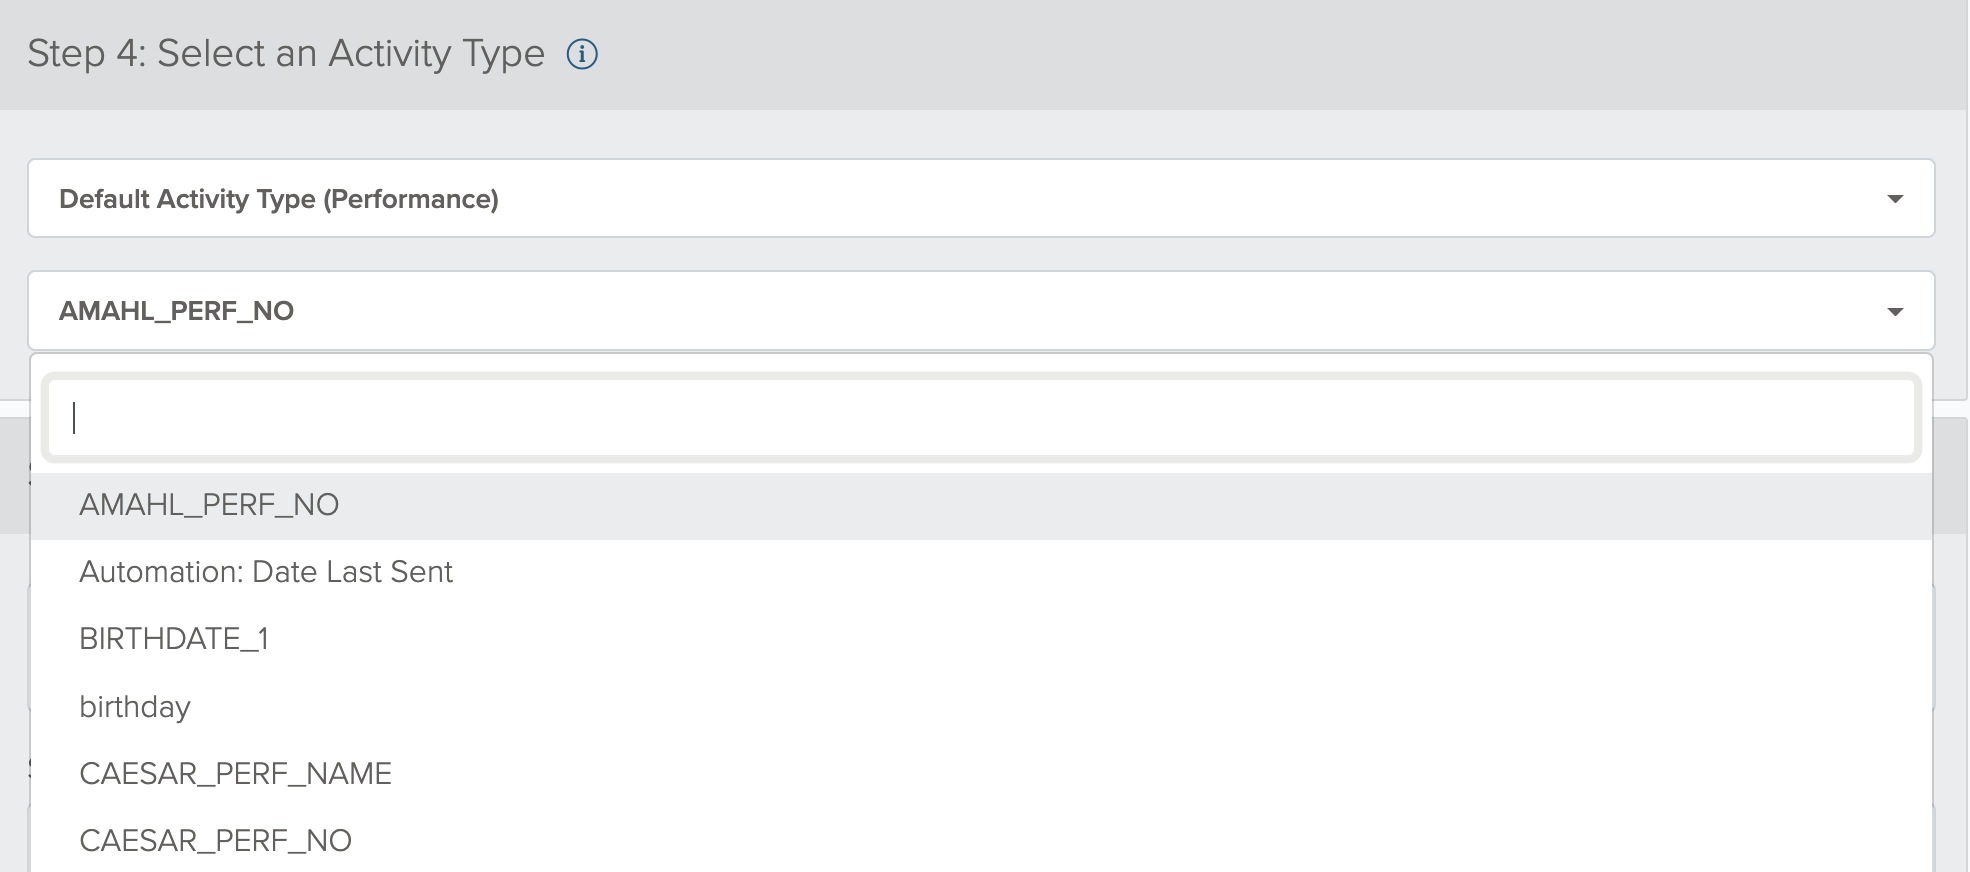
When selecting an Activity Type that has Performance indicated in parenthesis, a new field will appear where you can select the Prospect2 Custom Field that will contain the Performance Number. This allows you to associate the Customer Service Issue (CSI) that is generated by Prospect2 with a specific Performance Number (ID) in Tessitura. To learn more about this functionality, click here.

Activity Types that have a Perf_Ind of Package or Package / Performance will not display in the drop down.
Activity Categories, as defined in the Tessitura system table TR_CUST_ACTIVITY_CATEGORY can auto-close, meaning the CSI will be marked closed upon creation. Ensure the Activity Type you select is within an Activity Category that assigns the status (open or closed) that you’d like the CSI to have when created. - 5
-
Add Notes and Custom Fields (Optional)
Add text to the generated CSI notes field in Tessitura. You may also select custom fields, as defined on the contact record in Prospect2, to populate that data into the notes field.

To easily identify how the CSI was created, the notes field will always display ‘Generated by Prospect2’ and the contact’s email address. There is a 4,000 character limit on the notes field in Tessitura. If the combination of note text and custom field data exceeds 4,000 characters, the note in Tessitura will be truncated. - 6
-
Assign Urgency (Optional)
Click the checkbox to mark the CSI in Tessitura as “Urgent”

- 7
-
Click “Create Customer Service Issue”
Adding Your CSI URL into an Automation
- 1
-
Copy the CSI URL
Once the CSI is configured and saved, the Prospect2 CSI page will display a URL which will need to be placed in a webhook action within a Standard Automation. When you are ready to use the CSI, simply click the Copy to Clipboard option in the relevant CSI to copy the link to your clipboard.

- 2
-
Activate the CSI
To activate the CSI webhook, the CSI must be turned “ON”. CSIs in an “OFF” status will not trigger webhook actions.
The CSI may be in “ON” status, but a CSI will not be created until an action is taken to trigger an active Automation with a “Webhook” action containing the URL for the CSI. If you are not sure how your Automation will be designed, you can wait to activate the CSI until after the Automation is active. - 3
-
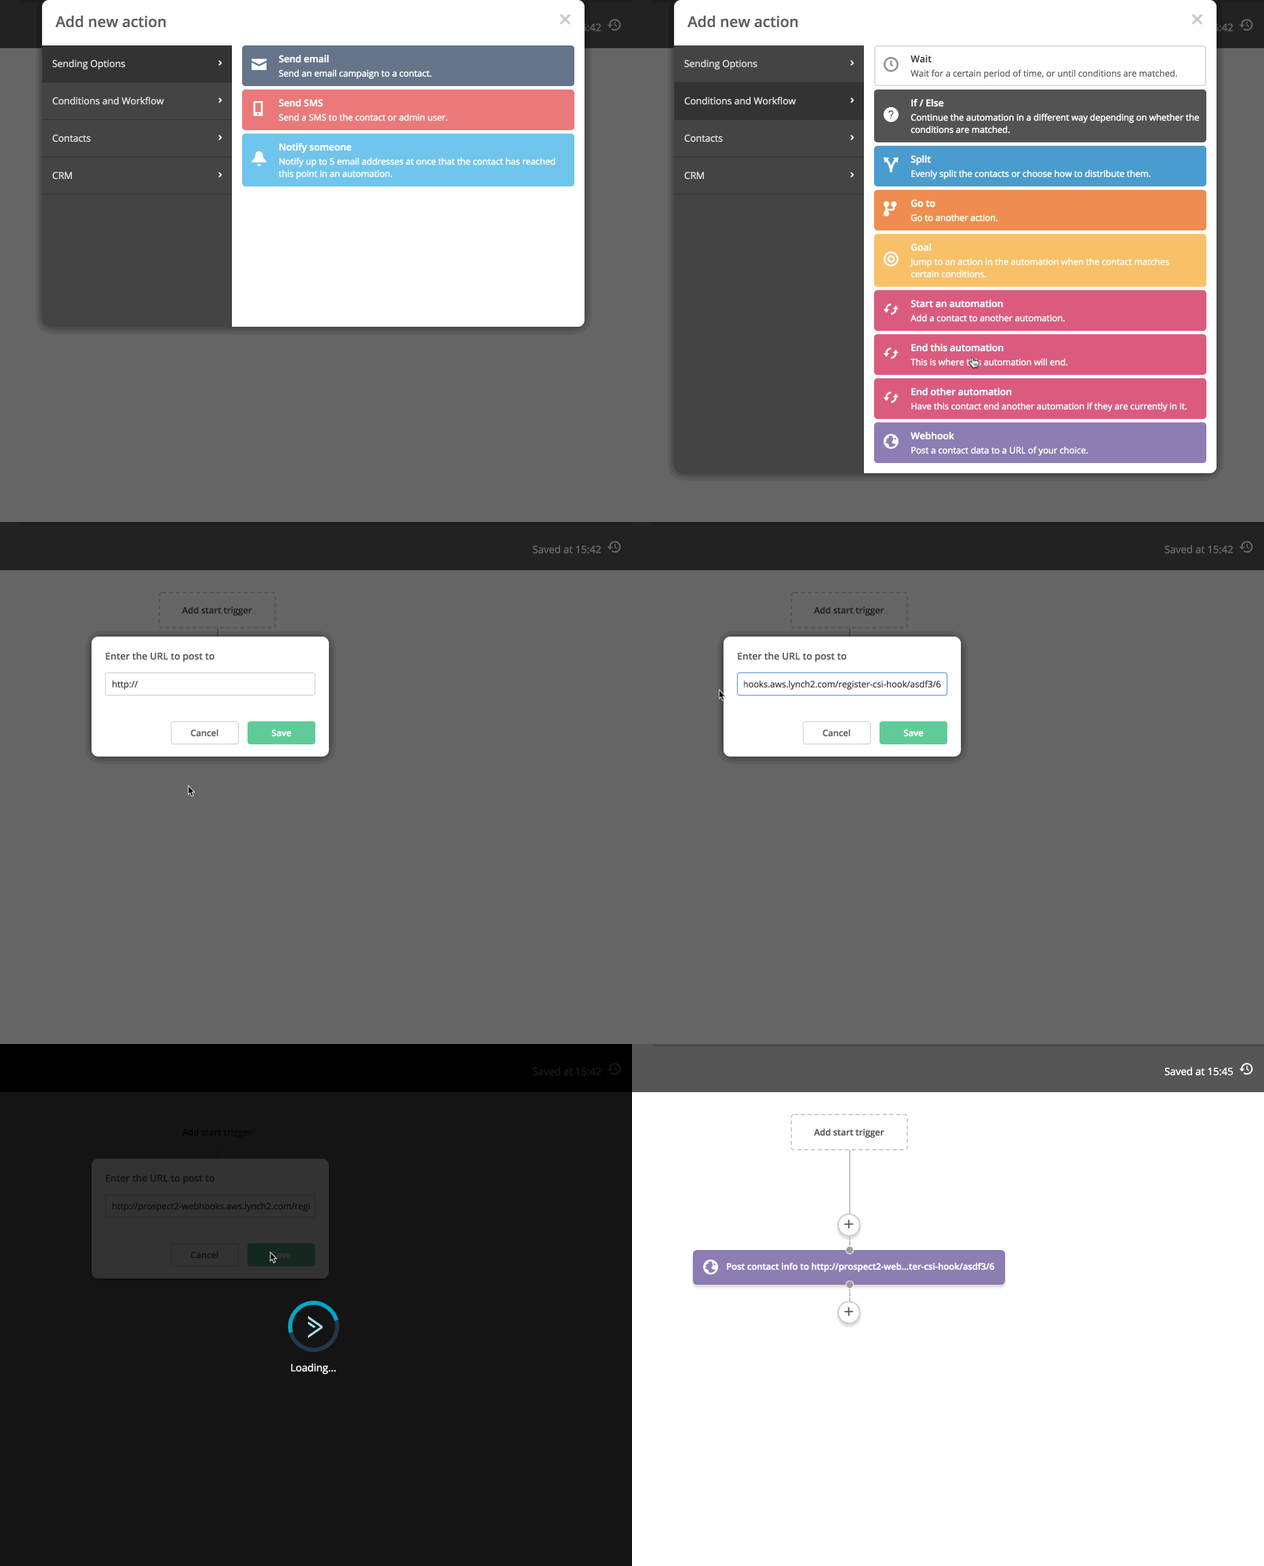
Add “Webhook” Action to the Automation
Once your Automation trigger is created, add a new action and within “Conditions and Workflow”, select “Webhook”. Paste the URL you copied from the CSI into the URL field and click “Save”.

- 4
-
Activate the Automation
Continue to define Automation actions as needed. Once ready, toggle the Automation from “Inactive” to “Active”.
• When a CSI Webhook is processed, Prospect2 will locate the lowest numeric constituent ID that has ownership of the email address that reached the webhook action in Prospect2.
• Origins that are associated with an Activity Type in Tessitura will not generate a CSI. If you have an Origin defined with an Activity Type that you plan to use in Prospect2, you must delete the Origin, or create a dedicated Activity Type that has no affiliation with an Origin.