Communicating with your Patrons in the Event of a Cancellation
While there are many different ways to communicate with your Patrons upon a cancellation, below are a few options. This is intended as a starting point for how you can handle this situation but like with a lot of things in Pro2, there are many ways to approach it! If you have any questions or want to run an idea by us reach out at help@prospect2.com.
Update Existing Automations
Edit content or replace an email within an automation that is associated with a Scheduled Trigger.
Edit An Email
Locate and Edit the associated Automation in your Prospect2 dashboard. Click on the existing ‘send email’ action(s). In this pop up there are a few options.
• Select a campaign previously used within the automation from the drop down.
• Edit to adjust content within your existing campaign.
• Copy and Edit to adjust content within a duplicate version of your campaign, keeping the original intact.
• Save as a Template allows you to use the template in both standard campaigns or when building a campaign in any automations.
• Create a New Email to start from scratch and select a new template.
Ensure your Scheduled Trigger in your Tessitura Integration Dashboard is turned OFF or ensure to apply changes well in advance of the next scheduled run. Test any changes prior to sending the updated content to your Patrons. Once you have confirmed your updates you can turn the Scheduled Trigger back ON. You can also choose to leave the Scheduled Trigger OFF and manually process a Run Now for specific performance dates (this works best with Performance Based Scheduled Triggers).
Start from Scratch
Create a new Scheduled Trigger to send cancelation information.
First, you you'll want to turn OFF your Scheduled Trigger and inactivate the associated Automation in Prospect2. These would be the automations that send your pre and post visit communications.
Then you will set up a new Automation in your Prospect2 dashboard and a new Scheduled Trigger in your Tessitura Integration Dashboard. This Scheduled Trigger can be configured as needed to ensure you're targeting the correct Patrons and communicating accordingly.
Do it Manually
Send a Standard Campaign.
In your Tessitura Integration Dashboard, turn OFF any impacted Scheduled Trigger. until the cancellation period is over. You'll also want to consider inactivating the associated automation in your Prospect2 dashboard as well.
Create a List Manager list in Tessitura that will target the correct performance dates and constituents in question. Utilize an Integrated Import with a unique tag so you can segment your final Standard Campaign send. You may also associate an Output Set with the List Manager list in Tessitura if you wish to populate additional data, such as Event Name and Event Date.
Identifying Existing Unsubscribes or Hard Bounced Contacts
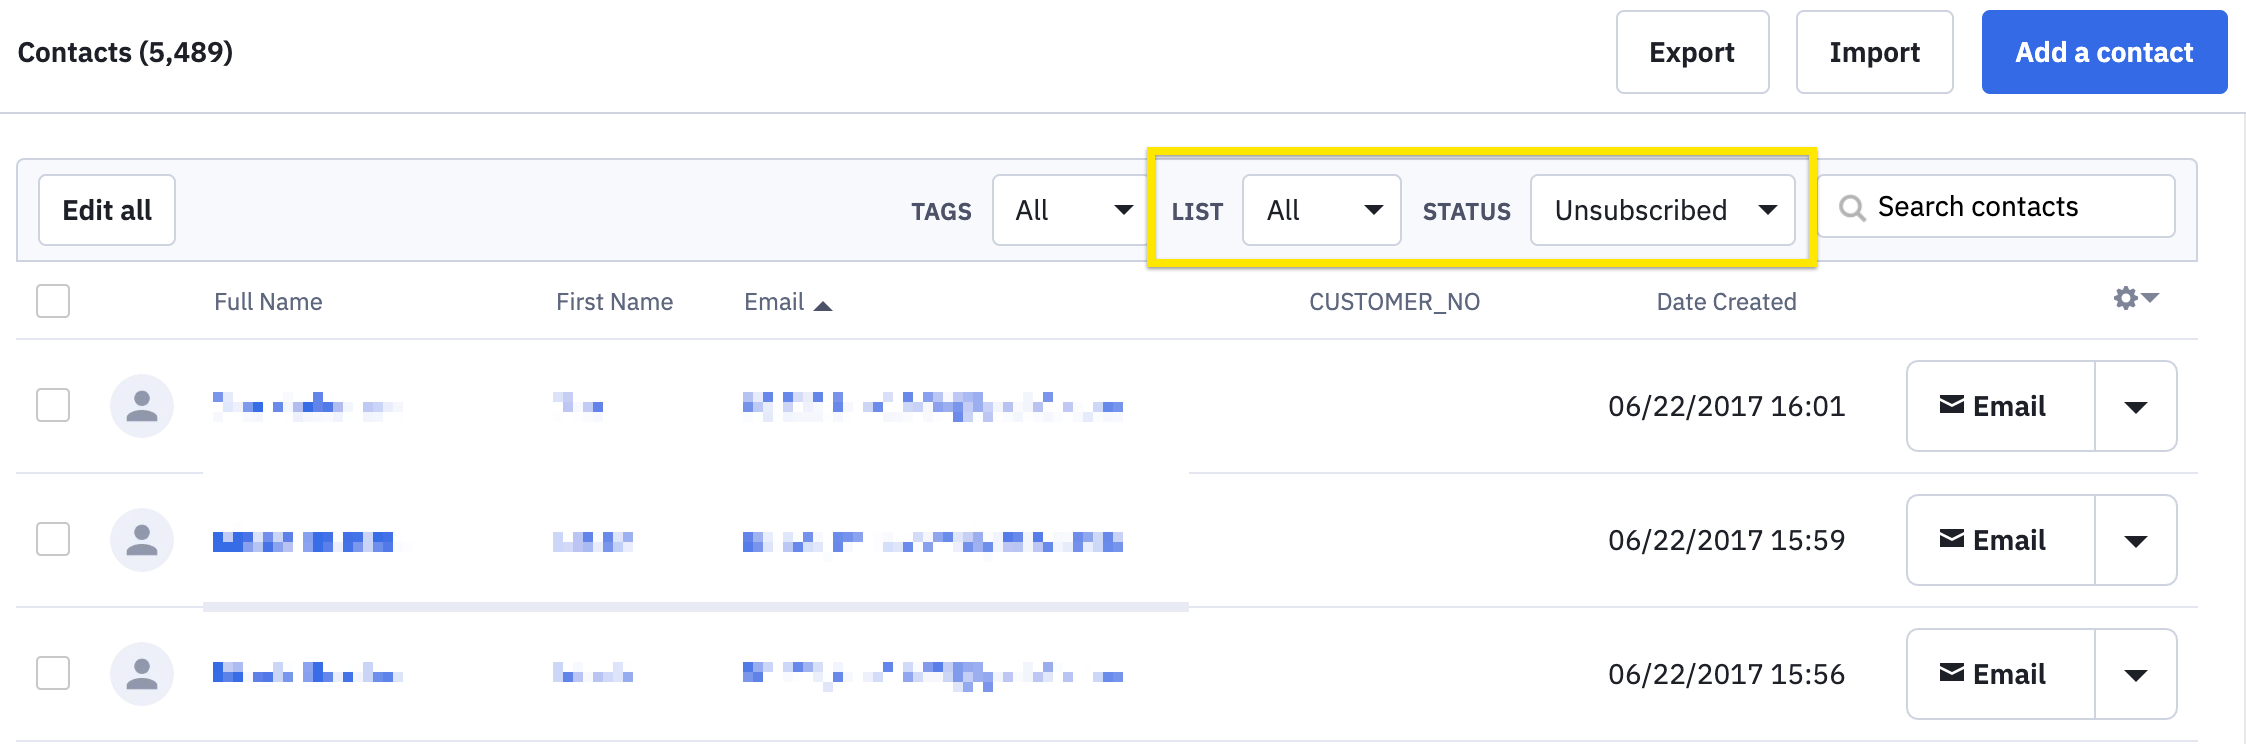
You can identify Unsubscribed or Hard Bounced contacts who are not eligible to receive email campaigns by filtering by status on the Contact page.
Existing Unsubscribes
To search for contacts who are unsubscribed from a specific list, you can filter with the List name in question and select the Status of Unsubscribed.

You can also look for contacts who are unsubscribed from all lists they previously had a history with. To do this, select All in the List filter and Status of Unsubscribed.
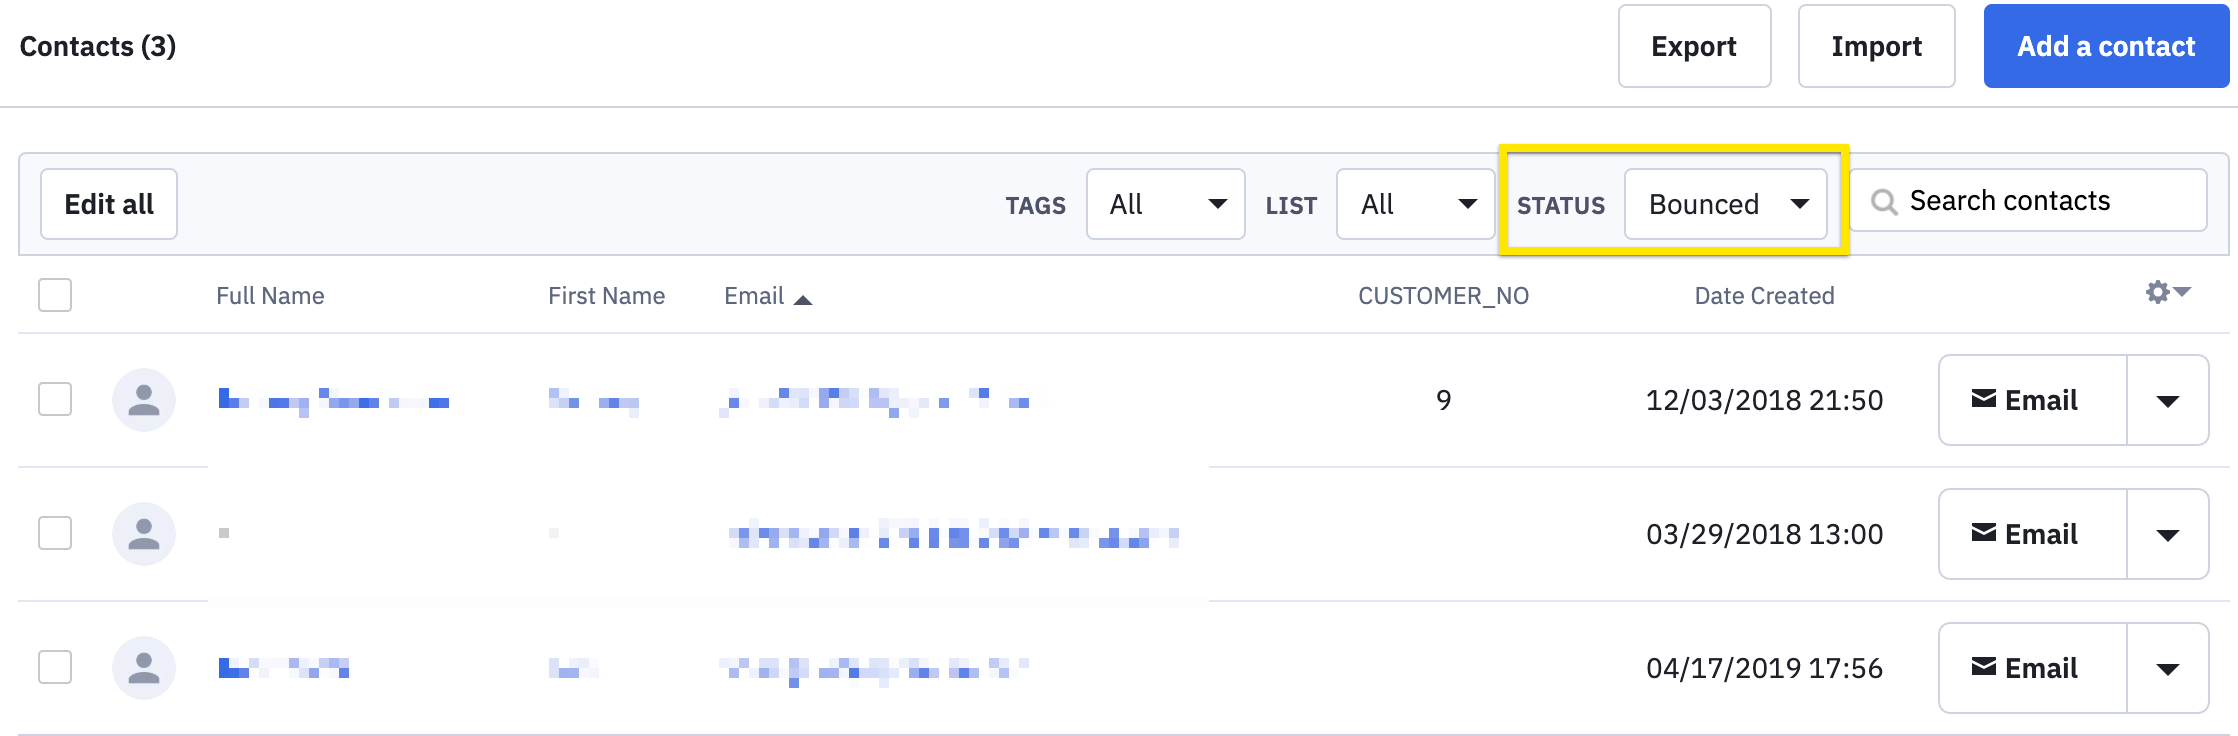
Existing Hard Bounces
On the Contacts page, filter for the Status of Bounced. This will return contacts who are bounced from at least one list. If you want to apply an additional filter to look for contacts who are Bounced from a specific List, select the name in the List dropdown.
User Managed Exclusion List
Contacts who reside on your User Managed Exclusion list will be suppressed from Standard and Automation Campaign sends. You can view the user managed exclusion list by going to the Contacts page and clicking on Manage Exclusions in the left sub-navigation.
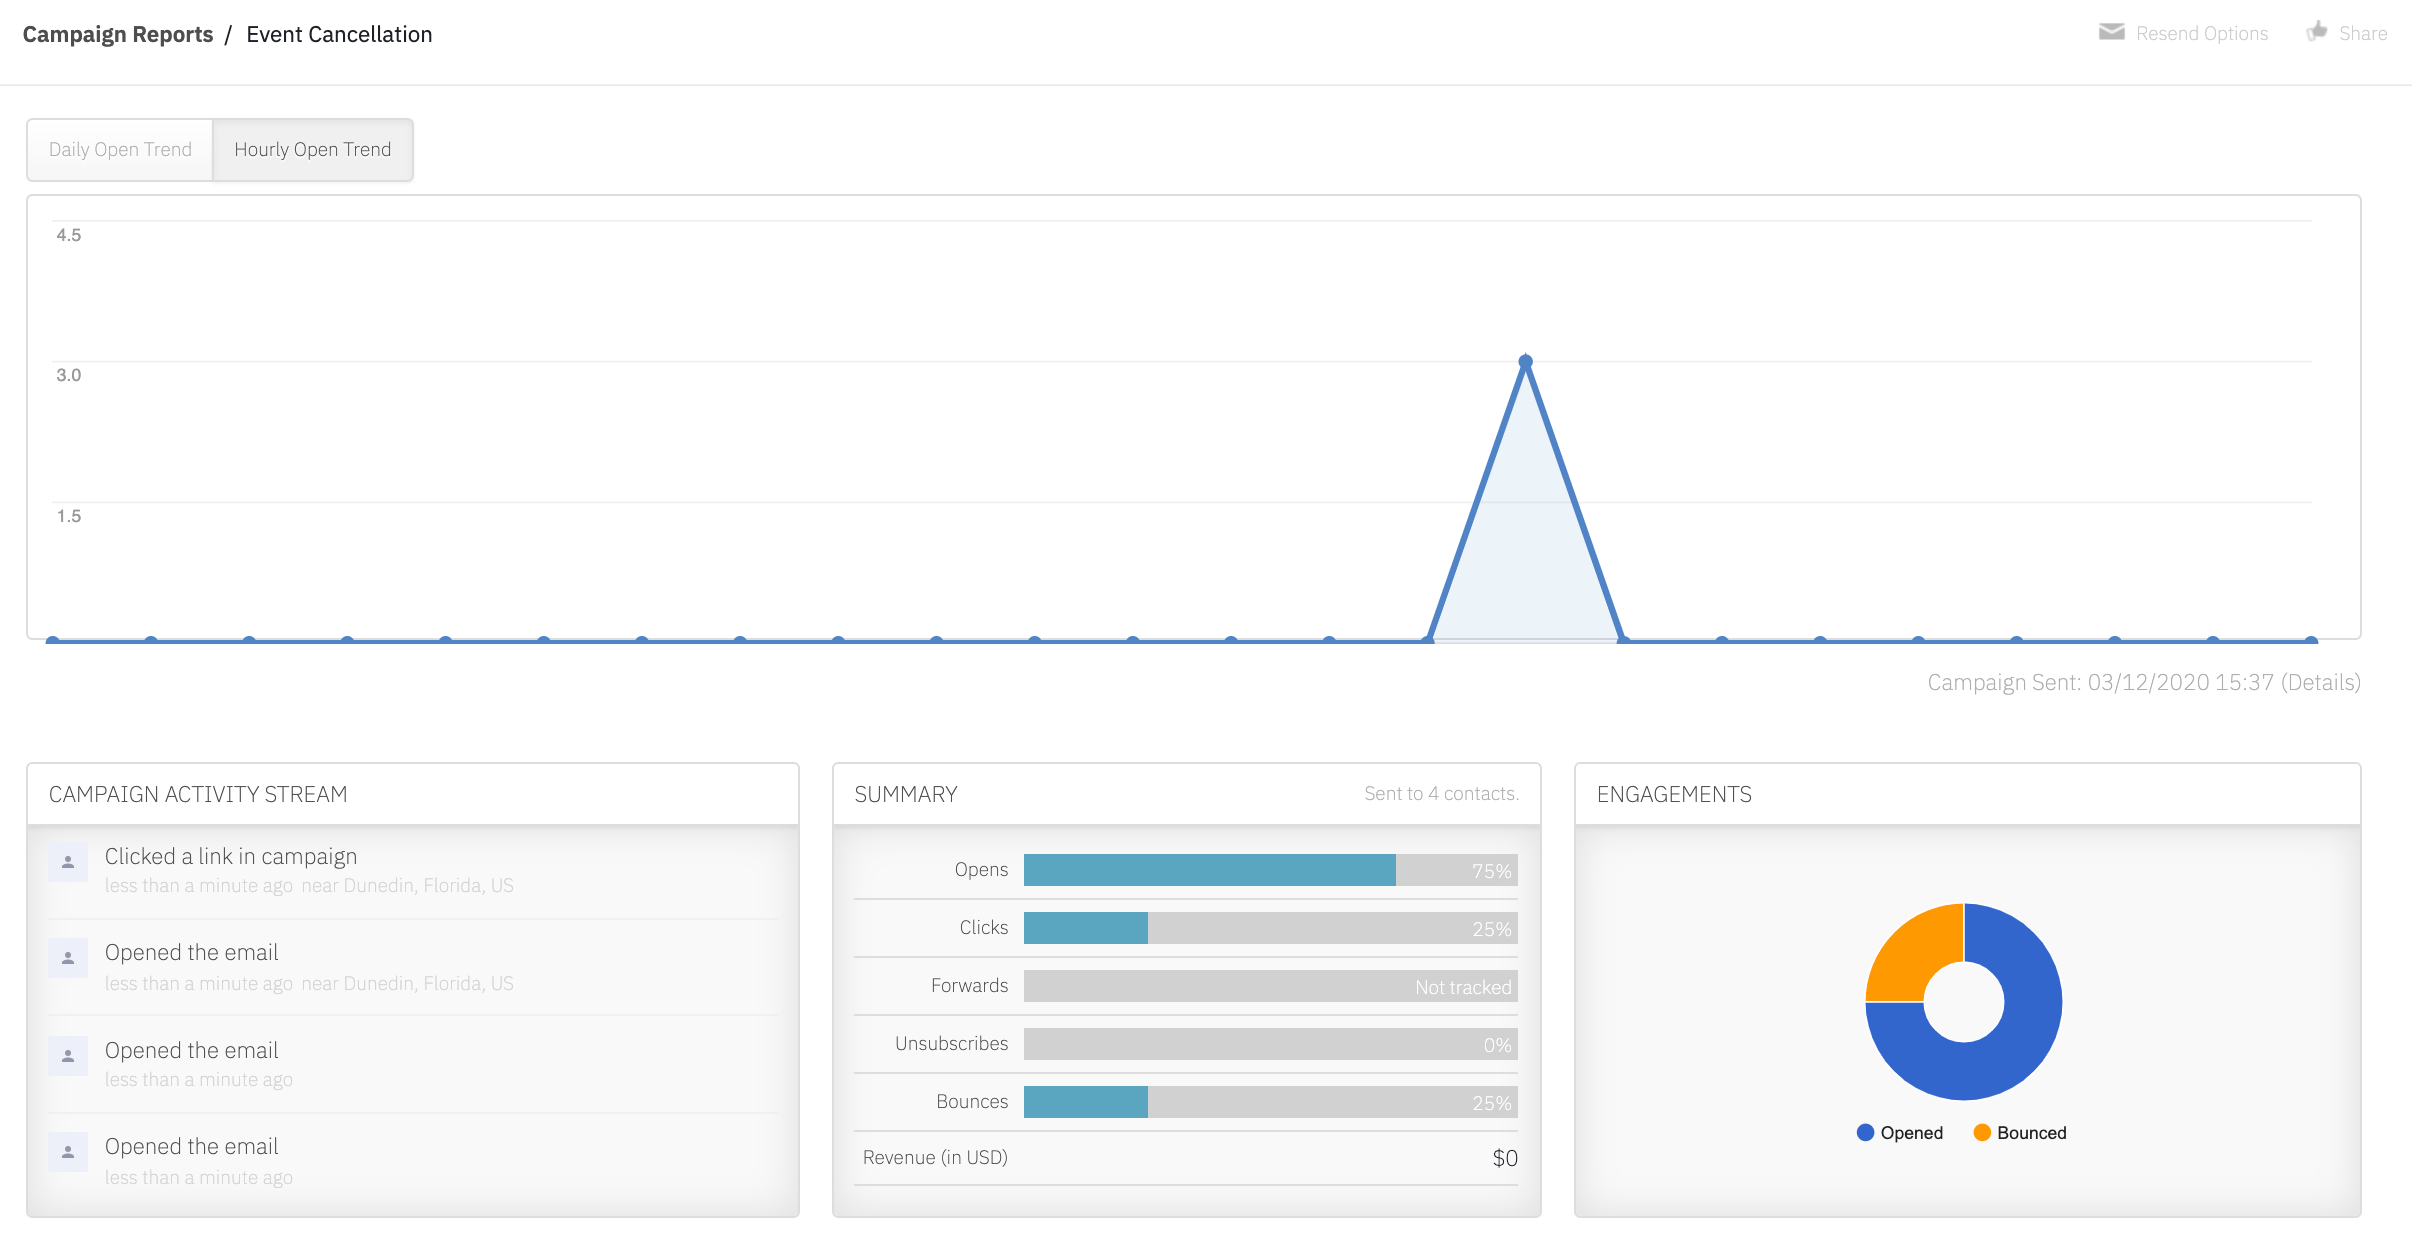
Reporting, Segmentation, and Re-Sends
Once your campaign has been sent, you can review the campaign report to see how it performed. Within the campaign report you can view who opened, did not open, clicked, replied, bounced at time of send, or unsubscribed.
If you need to re-send to contacts who have not opened your campaign, you may click the “Resend Options” button within the campaign report.
If you applied complex segmentation in your original Campaign send, the above method may not work. If that’s the case, you will need to duplicate the original campaign, adjust any segmentation, and send instead of using the resend option.
Anytime you want to re-send a campaign to contacts who have not opened, the segment should use the below conditions to ensure you’re only targeting those who were sent the campaign and have also not opened.

You can also choose to pre-create this segment on the contacts page. Once you searched for your contact results, you can bulk apply a unique tag to all of the contacts in question which could be used as your new segmentation criteria in your new Campaign, or save a new Advanced Segment that could be applied to your new Campaign.